Thursday, July 31, 2014

Tea for Me

This is a first for me as I have never tried to take apart an image and then put it back together. Enjoy!

I was inspired by the mood board for Scrap Around the World and wanted to use the pink color and the soft "feel" of the board. The pink powder reminded me of embossing powder so that is what I used on some of the trim for the tea cup. I also added multiple stamps to the cup and the background.


I started with a computer image and then deconstructed it. I used cardboard to make a replica of the teacup, this is way better to use than paper! I embossed the majority of the teacup and used a floral paper design for the cup. 


I added some flowers and embellishments and 2 beautiful butterflies from Renea Bouquet

Usually I take more pictures but my 15 year old dog had surgery (for the third time) today and I wanted to make her my priority. Cancer-hate it!

I hope you like the piece and try working out of your comfort zone-you ne'er know what will happen!

Thanks for stopping by my blog as leaving your lovely comments! It brightens my day. Carpe Diem! ~€

This piece will be entered into the following:

Scrap Around the World-July Challenge Light and Airy (HERE)

Love to Scrap-Scheming Crafters Challenge-(HERE)I used mostly duo with pinks and bluish colors


Thursday, July 24, 2014

Steampunk Planks


I saw a picture of a 3D wall art square frame and thought to myself, "I can make this!" and then I saw a scrappy friend had done one as well, so I drew my inspiration from Monica Longard, the magazine and the challenge board from SanDee and Amelie's steampunk challenge. 

First I cut cardboard into 4 planks and 2 smaller pieces that provide the support. I inked the edges with Archival brown ink.


Next, I cut out Bo Bunny paper to fit the planks and glued those straight to the cardboard and I inked the edges as well. TIP: Make a template that you can use, I found it to help out a lot! 

I went through my metal stash box and found all the gears I wanted to use. I applied washi tape to 2 gears and dry brushed those with gold Color Box pigment ink. I then put the gears where I wanted before gluing down (I always change my layouts until it feels right). After finding the right design I glued the gears down with E-6000, making sure that the gears looked like working gears. The black die cuts are from Cheery Lynn designs. I then added a metal belt piece and a flower I also dry brushed with the Color Box gold ink. 


This project will be entered into the following challenges:

I totally made this for the bonus challenge from SanDee and Amelie's steampunk challenge (HERE) and this moodboard


and also entered into the Retro Kraft Shop Challenge-Retromania 6 (HERE)


Thanks for reading and leaving your lovely comments. It brightens my day! Carpe Diem! ~€

Sunday, July 20, 2014

Trinkets Galore!


I needed a place to put all of my chipboard and embossing powders so I went to Hobby Lobby and found this plain white box ($1.99). I knew I could store a lot of chipboard in it and decided to make it my stash box. Obviously I had to turn it into a craft project. 

used two different scrap papers. The top is sprayed on the sides using Prima Bloom spray (Iris), Dylusions (Calypso teal), and Lindys Stamp Gang (Salt Water Taffy and Aloha Avocado). I glued my paper to the top and used different embellies to accent it, but not too many because I wanted to be able to take the lid off with no worries about messing anything up. I also sprayed some cheesecloth and layered it behind the chipboard pieces. The little 7 chipboard is covered in Inka Gold green/yellow.


Using a damask Prima stencil I added some texture to the side paper pieces, just to give it a shabby feel. I glued these to the sides and added some rub on words from Tim Holtz. 

I finished the edges with Powder Puff chalk ink Very Berry and now I have a pretty stash box. 

This design is entered into the following challenges:

Paper Crafting Challenge #14-Green, blue, purple (HERE)

Crafty Hazelnuts Patterned Paper Paper July Challenge-use patterned paper (HERE)

Anything But a Card #37-Anything Goes (HERE)

Lindys Stamp Gang color challenge July (HERE) I used the pinkish and greenish colors.


Thanks for reading and leaving your lovely comments. It brightens my day! Carpe Diem! ~€

Thursday, July 10, 2014

Summertime Dream ATC

This is my first time doing an ATC (I had to look up what an ATC was!) and also an ATC swap with SOE/SOD. Bear with me please. Lol!

The weather where I live is in the 99's and higher so this summer inspired ATC/tag is very appropriate. I used a 2-1/8" x 4-1/4" medium white tag. 

First I sprayed Lindy's Stamp Gang sprays onto my crafting table, then I rubbed the tag into the sprays and mixed it together. I ended up with 3 different tags all from the first spray (I think I used too much-but that is okay). 

I wanted this tag to remind people of the summer heat and sunset so I stayed with orange, yellow, and a touch of red. I have this interesting ribbon with holes in it that worked well with my summer theme after I sprayed it with the same colors as the tag. 

I cut out a square using some leftover scrap paper and stamped this sentiment on it because summer days always make me think of exploring (must be the dreamer in me). I added the butterfly and touched it up with some shimmering yellow Luminarte spray. I used the yellow on one of the flowers as well. The other flower I used Lindy's Stamp Gang orange and dry brushed some yellow on it to give dimension. 

The key was a no brainer-had to have a key to unlock the summer reality. Lol! Then I added the sunset orange ribbon to the punched hole at the top and this finished my ATC/tag.

I found this Etsy shop (Alleystamp) that sells so many mixed media products at very affordable prices. This is where I got the LSG sprays. 

This tag will be shipped to my swap partner and also entered into the following challenges:

SOE/SOD July/August ATC swap

Pixel and Paper-Ferris wheel inspiration=summer time fun and heat! (HERE)

Frilly and Funkie-Summer Heat (HERE)

Pinque Peacock #7-Summer (HERE)

Southern Girls Challenge-You Spin Me Round Baby, Right Round: you have to have circles in your project (HERE)

Through the Craftroom Door July 8-14, Anything Goes (HERE)

Thank you for stopping by my blog and leaving your lovely comments. It brightens my day. Carpe Diem!


Monday, July 7, 2014

Steampunk-Dress Form

I started this canvas for a SOE/SOD dress form swap but also wanted to enter it into other challenges.
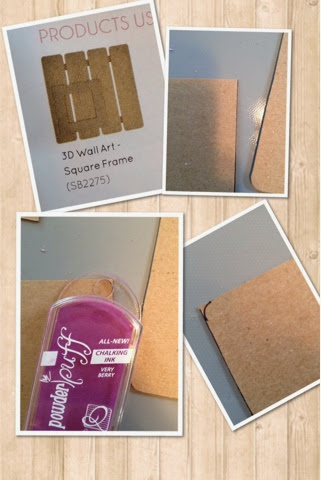
This is an 8x10 canvas. I always apply gesso first. I then used some Cherry Lynn dies that I got from Etsy (CheerfulScrapper link here) and applied more gesso since the dies were black. Then I figured out where the gears should go and added foam dots to some to give it a 3D effect and added some buttons. I used E6000 to glue the gears/cogs/buttons. 3 stencils/masks frame the edges of this canvas. 

Next I used sprays and mists to get the steampunk metal vibe. I usually grab some browns, greens, blues, and of course copper. I spray the lighter colors first and work from there. I waited for everything to dry and then applied Egyptian Gold Twinling H2O's to highlight the dies/buttons/stencils (I learned most of this from watching Gabrielle Pollaco's YouTube video)

*side note-the brown "dots" on the paper towel are made from my Starbucks cup and brown Archival ink. I used this on the birdcage (household item challenge)


Dress form-I hand cut (is this called fussy cutting?) the dress form and layered it using another household item and cardboard. This is a pic of all the household items I used! A plastic piece that held some cookies, some foam padding from a package I received, my Starbucks coffee cup, and leather.
Now, I had to walk away from this project for a bit because I had no idea what to do to finish the dress form. I grabbed my phone and felt leather! That made me remember I had leather pieces left over from another Steampunk project phone cover I did. happy dance! 

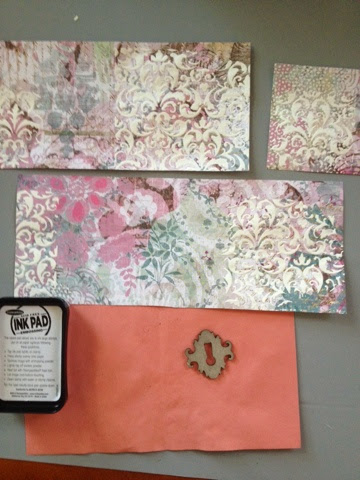
I cut the leather into strips to look like a skirt, added some washi tape that I pleated over the top and viola! I had a skirt! The top is made from scrapbook paper, some bling, and a small butterfly I hand cut as well. (I didn't use the bicycle on this canvas). Whew! Done!

This canvas will be entered into the following challenges:

SOE/SOD dress for swap on their facebook page

Mixed Media Monthly Challenge #2-around the house (HERE)

Altered Eclectics-July (always an Anything Goes challenge) (HERE)

SandeeandAmelie-Inventions and Inventors July challenge for the 3D section. I am the inventor of this dress form canvas invention. (HERE)

Through the Craftroom Door-Anything Goes July (HERE)

Rhedds Creative Spirit-July Challenge-Altered Art Only (HERE)

Thank you for stopping by my blog and leaving your lovely comments! It brightens my day. Carpe Diem!