Saturday, February 27, 2016

Coffee Time in Venice

Never thought I would say this but, I just made a canvas using only coffee! Instant coffee, coffee beans, ground coffee, and coffee archival ink! Yeppers, and it smells delicious!!!!

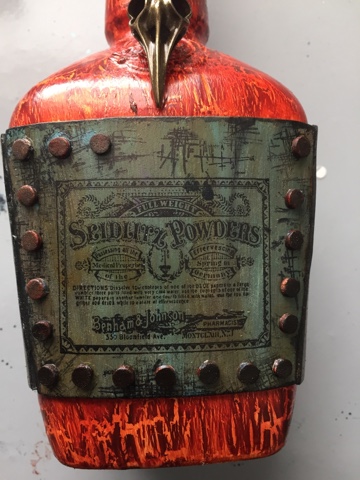
I tried a couple of new techniques and had plenty of fun on this canvas journey. I started with watercolor paper (first time using this) and plopped and splattered on some instant coffee, spritzed it with water and then blew on the paper to get my drips! HUGE TIP-remember to breath during this and not get overexcited, I kinda got dizzy because I just kept going. Hahaha! I used this same technique on the canvas but ended up adding more coffee over the top and edging the canvas with Coffee Archival ink. 
The next step was to use some coffee grounds and DecoArt crackle glaze mixed together and smooshed through a stencil! My art studio smells divine! Yummy! Then I used the instant coffee and dipped a small coffee cup bottom into it and created the circles. The word Coffee was created with the bottom of the cup as well. I used the word Adore, because I adore coffee and am a cranky lady if I don't have any.
While this was drying I got to work on the spoon. I didn't have a silver spoon so I used one I found in my kitchen leftover from takeout. I smooshed some coffee grounds on the handle and into the top of the spoon and then added coffee beans to the lower portion. And finally I wrapped twine around the spoon for more texture. 


I found this lovely image that reminded me of good coffee times and knew I had to use it. My husband and I had our first date at a coffee shop. :) The chippies were left raw under the image and I layered some papers under the frame. I used a stitch stamp randomly around the edge. I really wanted to use my sewing machine but it didn't work out this time. Oops, I need a new needle. 

Then I poured some coffee beans out and glued the beans where they fell. I used some Liquitex Super Heavy Gel but it didn't work well so I had to go back over all the beans, one at a time with TomBow Multi! Talk about time consuming but it was worth it. I got the beans for free from my favorite coffee shop. Aren't they sweet (the baristas not the beans, but the beans are wonderful!) And of course I was drinking my favorite coffee drink, a Caramel Macchiato, while making this canvas! Hugz and Carpe Diem! ~Niki

I couldn't have finished this canvas without the help of a dear friend, Sara, from Sara's Closet. Thank you for the nice text, it came at the perfect time! Cheers to puppy breath! and huge hugz to you muffin! One day we'll share a cup of coffee, well tea for you and coffee for me!


I would like to share a cup of coffee with these challenges:


I used everything!

Mixed Media World #11-Love is in the Air
I think my love for coffee is apparent with this design, it is also where my DH and I started our relationship and every year on our anniversary we go to our local coffee shop and order exactly what we ordered the first day we met. Aww!

Kort-O-Mania Challenge #147-Anything Goes


Monday, February 15, 2016

Altered Rusty Lava Bottle

Well a new chapter has started at SanDee&Amelie's Steampunk Challenge. The theme is "Anything Goes" as long as it has a Steampunk(ish), Industrial, or Vintage feel. I wanted to try making something masculine because I don't remember a time where I made something specifically manly. So, I had a Maker's Mark whisky bottle and the process started. Hiccup!
I applied 2 coats of HEAVY white gesso to the entire bottle and left it to dry overnight. I have been learning a lot about altering bottles and using the heavy gesso always works for me. Next came some DecoArt Quinacridone Gold acrylic paint.
I left the label spot blank but could have painted it as well. Then next step was a coat of DecoArt Weathered Wood and when it was dry I painted a layer of DecoArt Transparent Red Iron Oxide. While the paint was drying I layered on some rusting powder to the neck and lid of the bottle then set out making my label. 

The label was made from crafters foam (fun foam) and painted with Quinacridone Gold, then a coat of Titanium white antiquing cream and then a layer of of Patina Green Antiquing cream (drying between layers). I used a baby wipe to rub off some of the antiquing creams and  then randomly painted some Transparent Yellow Iron Oxide here and there. 
I grabbed a few stamps and had some fun then used a paper puncher to make my "nail" heads. Those were made from fun foam and painted with Paynes Grey and Quinacridone Gold. 

A coat of DecoArt Matte Varnish was painted over the labels and some light inking in black was applied to the entire bottle. The side labels were painted the same as the front (and back) and stamped with a different stamp.The picture below is of the side and back of the bottle. Viola! 

I can't wait to see what you create, and remember to check out what my teamies have made as well! Hugz and Carpe Diem! ~Niki


Thursday, February 11, 2016

Valentine's Day Card

Hello everyone! With V-Day 3 days away I figured I needed to get started on my hubbies card. I decided to make him one this year (a first for me) because I love him and he deserves a handmade piece! Yeppers, he's awesome sauce like that! Haha!
I kept it mostly CAS/masculine but of course had to experiment with a new way to create some patina! One of my favorite artists growing up was Amy Brown (and she's still awesome sauce!) I remember getting her book when I was younger and she experimented with paints and salt. So I grabbed some salt and sprays and performed my own experiment. Here are two results.
The above picture features stamping with a TH stamp and heat embossing with Rangers Verdigris EP and multiple layers of LSG sprays with a layer of salt here and there. The picture below features larger salt grains, LSG sprays and DecoArt Carbon black mister.  
Pretty! Sometimes I am sad to create a background because I don't want to cover it up with anything! Know what I mean? 

Anyway, I used the larger panel to create my 9 small squares and edged those with Copper Inka Gold. Those were adhered to black cardstock that I spritzed with DecoArt misters and LSG sprays.  
The X's and O's were found in my Alpha letters stash. They don't all match but it's okay by me. I rubbed some of the Copper IG on those as well and left the Glittery X's alone. The heart was drawn and cut out then painted with Carbon Black, a coat of multi medium and Prima black micro beads were added for texture. I stamped inside the card as well but that is a secret! Hehehe!

I would like to share this masculine card with these wonderful challenges:

(Hopefully my new patina painting technique has an industrial element, I also used metallic copper cardstock for the base)


Sunday, February 7, 2016

Altered Glass Bottle, the good, the bad, and the beautiful.

How many of you try a new technique or, for lack of a better word, process, and just end up hating (strong word) the results? I just made an altered glass bottle and even though I did a post about it (HERE), I wasn't happy with it. So, I was determined to improve and experiment. And experiment I sure did! This is only the 3rd bottle I have altered but the first time really experimenting with paints and so many elements and learning what works (for me) to get paint to stick to the bottle.

Now the first thing I wanted to know was-how does paint stick to the bottle? I tried gesso, multi medium and wasn't having the best result. So for this bottle I tried HEAVY black gesso and when it was dry I used the multi medium over the gesso, then applied a second layer of heavy black gesso. Win! I then applied some white gesso and crackle paste randomly with my finger.

The next step was to add all the different elements to form my design. I raided my stash and then some! One thing I have yet to read about is the cost for making this type of bottle. All of these many different elements add up. The metal flowers, the gears and cogs, the springs, the wooden arrows, the pen nibs, the floral pick, the clock face, the metal leaves, the metal filigree.....the end result is definitely worth it but now I know how much it actually costs. Whew! My local thrift store was a shopping haven for some of these elements though. I applied almost all of the elements with a hot glue gun because I couldn't wait for the multi medium to dry (patience isn't my strongest trait, but I am working on it). The hot glue worked very well because I already had the layers of HEAVY gesso and multi medium for the glue to stick to. All of the elements got a good coat of white gesso (not heavy white gesso).
 Color! Now the hard part. For me, adding color to a design is the make or break point because I sometimes don't like the end result. Such was the case for this bottle. I used about 5 different Primary Element mica powders, some Silks and LSG sprays (blues, greens, gold, copper, purple, pink). It was okay but not what I had pictured in my head. This is one reason I love mixed media-you can just keep adding paint! So add away I did!
The final layer of paints were only blues. I dabbed, spritzed, sprayed, splattered and even sponged until I was happy. The bottle is dark so you can't really see all of the drips and splatters. When everything was dry I used my finger to apply some silver Rub-n-Buff to highlight areas and then added some Wow Embossing Powder-Vintage Peacock randomly. Here are some close ups. The picture below is of the top of the bottle. Aren't those springs fun!?! I think so. This is where most of the crackle is as well. NOTE WORTHY: All of the pictures I have taken were with an Iphone 6 and no filters. I don't have a camera or use any apps to make my pics look better.

 The picture below is of the middle of the bottle where most of the elements are. I think that the bottom layers of paints/sprays/powders really added nice contrast to this design, and it shows up amazingly in pictures.

This is what I am calling the "bottom" of the bottle. I sure do need some more of those Roman numerals (loves 'em)! See the difference between the indoor vs outdoor pics? The indoor pics show more of the paint colors underneath, whereas the outdoor pics show more of the blue. Awesome sauce!
Outdoor Picture

 This final picture is in front of a large lantern I designed for my entryway. I do believe this experiment was a success and my hypothesis was sound-using HEAVY gesso will result in better paint "stickage" to a glass bottle. Hugz and Carpe Diem! ~Niki
I am thrilled to be sharing this altered bottle with these amazing challenges:

I believe I used every color in this color challenge. 
The LSG colors I used the most are: Delphinium Turquoise, Jack in the Pulpit Teal, and Sweet Violet Purple Teal


I took inspiration from the quote. This bottle is a rainbow of color underneath it all.

Simon Says Stamp-Work It Wednesday-Use Something New
(I have used new LSG sprays, Silks, Wow Embossing Powder and new techniques)

Emerald Creek Dares-Love is NOT in the air
This bottle is a perfect gift for a single person, and if it were full they wouldn't have to share any of the yummy wine. :)

UPDATE:
This bottle is featured on Tuesdays Tutorials with Marjie Kemper
http://marjiekemper.com/blog-series


Friday, February 5, 2016

Grungy Love at Anything But Cute #10

Well it's that time of the year where Cupid is flying around acting all sorts of crazy. So at Anything But Cute #10 we are celebrating love-grunge style! Our fantabulously amazing hostess this month is: Sara Emily of Sara's Closet and here's what she would like to see: To celebrate Valentine's Day, we would like to see you make a Grungy Valentine's project for your sweetheart! It can be a card, tag, or anything else you might give a loved one to show them how much you care. Just be sure it's Grungy!


I decided to try mending a heart (artistically). My best friend just had an 8 year relationship end and I thought she might be cheered up with this design. Her Destination in love is Unknown as of now, but I am confident she will find the right dude!
I started with a 5x7 canvas and used the TCW brick stencil then made my heart out of cardboard and some of the Cold Country papers. Love that paper set! I then added some holes so I could stitch my heart back together. I used elastic thread and a rather large needle so I could double up on the thread and my fingers wouldn't hurt so bad. The holes were pre-punched with a hammer and a nail. Smashing success it was! Lol

I then sprayed my canvas with some black DecoArt spray and wiped off the excess. When that was dry, I sprayed with some Colour Arte Primary Elements-Hunter Gray that I put in a mini mister. Random bricks were painted with Silks-Black Emerald (my new favorite color!) and some were painted with white acrylic paint. I added the hooks in the bottom left corner with Glossy Accents. 
I wasn't sure where to go next with this design, so I walked away for a bit. When I came back to the canvas it screamed at me-flowers! I am not a big flower person but that is what my canvas was telling me. So, I went to my small flower stash and pulled out a few and painted those with the Colour Arte-Black Emerald as well. The feather was inked with Alcohol ink and then lightly dry washed with the Emerald Black. I added some Black Prima Art Ingredients Mico Beads with Mod Podge.
The "corset" lace up was a blast to make and something I am going to be doing again and again, and maybe again. I used embroidery floss doubled up and tied it into a bow. The bow was glued to the canvas just in case, I didn't want it to come apart and fall off. The entire canvas was then splattered with white and black acrylic paints. I covered the heart, flowers, and corset with scrap papers so it would stay nice and clean while splattering. The plaque at the top is chipboard and stamped with my sentiment, with brads in the corners and the edges are dabbed with black acrylic paint. I sure hope you enjoyed this design as much as I did making it. My new favorite piece. Don't forget to see what my amazeballs teamies have come up with for their Grungy Love designs! What will you be making?

Come to think of it, those hooks look like what you see on your bra, hmmm, well I believe I used these bra hooks in a more unusual way. :) Hugz and Carpe Diem! ~Niki

I would love to share this canvas with these delightful challenges: