Thursday, March 24, 2016

Non traditional Easter Basket

Well it is almost Easter, and I really wanted to make something for Easter, but not anything that's typical. I knew I wanted to create a centerpiece so this is what I came up with. A non-traditional egg basket-box tray. Hehe!

I found this on clearance at a local craft store and automatically had a vision. Love when that happens. It didn't turn out exactly as I had hoped, but very close. 
I painted the entire egg holder with Walnut Stain DP, then a layer of Distress Crackle. While that was drying I set about determining what to do with the eggs. I knew I wanted to stay with a limited and earthy color palette. I painted one with Walnut Stain and applied the Distress crackle to it as well, then set it to the side to dry. Two of the eggs were painted with Picket Fence DP and then covered in tissue paper. 
I used some Tim Holtz stamps and stamped with Ranger Archival Ink-Coffee onto some tissue paper then used Ranger matte medium to adhere the tissue paper to each egg. Then I watered down some Walnut Stain DP and used it to create splatters on the eggs. 
The Walnut Stain egg was "painted" with Picket Fence DP and I heat set if for a sec, then wiped it off with a baby wipe so the Picket Fence would get into the cracks. Then I used a scrap piece of tissue and wrapped it and a twine bow around the egg. Some of the crackle came off but that's what I wanted, kind of a vintage feel. The splatters were created by adding water with Archival Pearl and PF and flicking my brush.
The last two eggs were altered using moss and twine for a nature feel. Then I used the Picket Fence and baby wipe for the outside of the box. I swipe some Distress glaze around the outside of the box before I stamped. I added the Tim Holtz stamps with Ranger Archival Ink and added the chit-chat sticker last. The sticker was edged in Walnut Stain as well. 
 I really enjoyed how this turned out and the Reese's bunny is my DH fave so of course I had to add it. He also gets other Reese's candy as well. 
 Here are a few different views of the box. This was a bit hard to photograph and capture the true look of the design. The sun was gone today and it's raining so that doesn't help. 
Finally stopped raining for a bit so I took these pictures outside. No sun, but at least it wasn't raining.
I hope you all have a wonderful Easter weekend and live in the moment! Hugz and Carpe Diem! ~Niki

I would love to share these eggs with these amazing challenges: 


Sunday, March 20, 2016

Lilac Spring Reverse Canvas

Happy Sunday to y'all! Too bad tomorrow is Monday (for me) and back to the grind. Today is also the first day of Spring in my neck of the woods so I decided to make a Spring type canvas to celebrate. I usually take plenty of process shots but this time I didn't, I was in the zone. Lol!
I am really enjoying making reverse canvases. This is my second one and I see a couple more in the near future. Here's what I started with, some elements made it to the end and some didn't. 
I wanted to create a vintage garden type theme and knew that cardboard would provide the texture and depth I wanted for the base. I cut my cardboard to size and peeled back some of it to get the texture. I used the left over peeled parts to go around the edges of the canvas. Everything was glued with matte Mod Podge. Then some stamping and crackle glaze were randomly applied. I made the nail heads out of craft foam but ended up changing it in the end to round ones. Texture sand was smeared under the nails to create my rusty drips. I used Quinacridone Gold and Rusty Hinge to paint the drips and some brown paint as well. 
The ornate frame was a splurge and believe I should get another. Hehe! I applied crackle glaze to it and then Raw Umber antiquing cream and once dry, wiped it back with a wet wipe. 
 Lilac colored paper and a stamp created the inside of the small frame. I adhered it to the canvas with heavy gel and some foam dots in the center of the frame. Then my nest was added. The nest was painted with Q-gold and the eggs were painted a lilac color. 
 I was still trying out different placements of the elements. The chicken wire and the Beauty chippie were rusted with ground cinnamon, a small amount of instant coffee grounds, and q-gold. I learned this technique from a good bloggy friend, Sara Emily at Sara's Closet and she made the most magnificent tag! It smells so good, the cinnamon technique but I am sure her tag does as well. She's one of the reasons I tried this design. 
The feathers are another new technique for me. I have used plenty of feathers in the past but this time I swiped some DI in Shaded Lilac to one feather. The other two I used a stamp with some Versamark and then sprinkled Primary Elements-Plum Crazy on one and sprinkled the other with Perfect Pearls-Grape Fizz. Here's a close up of that detail. I saw Cristin at Mixed Media Place do this with a stencil and thought a stamp could work as well. It sure did! It's so pretty and easy to do! Awesome sauce! 
This is a close up of the different cinnamon techniques and rusty designs. I love rusty techniques and enjoy learning different ways to create rust. The picture below shows three different techniques. 

 The ribbon was handmade and died with Shaded Lilac and Luminarte Snapdragon. I tried other purples but there was too too much pink in em. The 2 colors I used were true to the purple without the hiccup of the pink. Thank goodness! 

I would love to share this design with these inspiring challenges:

I used the lilac color, the butterfly, and the soft feel of this gorgeous mood board. 

Pastels and eggs make me think of Easter. 


I have made the crafters foam, the chicken wire and the chippie look like rusty metal nail heads.

Stamplorations March Challenge Theme-Stamps and Texture

Tuesday, March 15, 2016

Steampunk Layout with DecoArt

Are you ready for an adventure? Our theme over at SanDee&Amelie's Steampunk challenge is Anything Goes! I decided to try my hand at a new adventure-a layout! This is only the second layout I have ever tried to create. The first (created about 1.5 years ago) ended up burned and torn and up in smoke, literally! I set it on fire. Hehe!

I started with a 12x12 paper from Tattered Time and used some different sized scrap papers to layer behind my picture. Yeppers, that's little ole me in Branson, Missouri. One of the best vacations of my life, so far. My lovely Grandma was laughing so bad when I was posing because I actually fell off the counter. Oops! I get my klutziness from her. Lol! This LO is all about us gals. 
I laid my chippies out where I liked and took a picture so I would remember where to put em all after I painted everything. It always help me to take a pic so I can see what looks good and what looks wonky. 

The large gear was cut in half and left raw. The key and Explore were painted with DecoArt metallic gold paint. The cogs/gears and the dress form were painted in layers. The first layer was DecoArt Paynes Gray, then DecoArt Turquoise Hue, then DecoArt Quinacridone Gold and finally some Carbon Black around the edges for depth. 
My little "Most Wanted" sign was edged with ink and popped up on foam dots. It was part of the picture that I cut up. 

Using all the colors I used on the chippies, I put a dab of each on my craft mat and added a little water, then flicked and splattered all over the page. Fun times! I did put a piece of scrap paper over the picture so it would stay clean.

I enjoy Steampunk a lot and thought this picture (that was hanging out in a cardboard box in the attic) would be perfect to showcase my guns. Can you see my muscle? Lol!

Come on down and join in the Steampunk fun, and while you are there be sure to check out what my teamies have designed! Hugz and Carpe Diem! ~Niki

I am passing this LO to these wonderful challenges:


Simply Papercraft Challenge #25

Frilly and Funkie-Let's Make it a Trio
I used 3 different kinds, and colors of gears.

Tuesday, March 8, 2016

Neons and Sprays

Well there comes a day when you try something completely new and find out some helpful tricks among the way. I've never worked with NEON colors before but today's their lucky day! I wanted to join in a couple of challenges and a new one that Andy Skinner is hosting. Here we go! Sit back and enjoy.

I used an old ruler to create the lines and texture in the DecoArt modeling paste. It was a fun and new experience. My canvas is a chunky one with thick edges. Then I left it overnight to dry completely.
 I knew I wanted to use sprays because I just have more fun with em than a brush. I figured I could make some sprays with the Americana Neon paints (Electric Blue, Thermal Green, Scorching Yellow, Torrid Orange, and the non neon-Lipstick) and grabbed some small 2oz bottles from a grocery store. I put 6 small beads and one large bead in the bottle before adding the paint because I figured it needed a mixing ball. :)

You can see in the photo above how much paint I added to each bottle. I then filled up the bottle with warm water and put the spray lid back on and shook everything up. It sounded like a mixer ball was in the bottle! Yippee! Then I sprayed a scrap piece of paper with each color to see how it worked. 

The purple color was a mix of the Neon Electric Blue and Satin Lipstick with a pinch of Purple Pearl metallic thrown is as well. 
I grabbed my spraying box (fancy name for a paper towel lined cardboard box I use to apply sprays on a canvas) and started spraying. I applied heavy coats of each color and dried between each application except where I wanted the colors to run together. 
Using a Spouncer tool, I applied DecoArt Carbon Black around the edge of the canvas and on some of the textures areas. Using the Carbon Black again and the Spouncer, I added an Andy Skinner Day of the Dead stencil. Go easy on the paint and brush some on before applying to the stencil or some of the paint with seep under the stencil. 

Now I wanted to stamp onto my canvas but that's never worked out for me so I decided to stamp onto some tissue paper and adhere it to my canvas. I didn't have any of DecoArts Media matte medium so I used Duraclear matte varnish. Of course I practiced on a scrap piece of paper first. 
It worked out okay so I went for it! And here's the end result! Very eclectic canvas and an interesting art journey. :)
It really is more vibrant in real life (can you imagine!) and I am glad I tried my hand at these very Bold and Bright and Loud colors. The funny part about this design is I went into it thinking I would do a more abstract design but that wasn't my journey. Lol! Hugz and Carpe Diem! 

I would love to share the neon with these challenges: 


Saturday, March 5, 2016

Vibrant Colour in a Mixed Media Tag!

Hello and Happy March! Its time for another challenge at the wonderful Anything But Cute! Our very vibrant and fantabulous hostess this month is Branka, from Vintage Handmade. Branka makes some amazingly vibrant and colorful designs so her challenge theme was meant to be. Can you guess what the theme is based on my tag? So bright and colourful!

Crazy for Colour is our theme for March and this is what Branka is looking for: "Spring is coming-a time of the year that brings amazingly beautiful colours! To celebrate it, we would like you to create a mixed media project using VIBRANT COLOURS. It can be a tag, a card, an art journal page or anything else. Just be sure it's vibrant!' Love the badge for the challenge!
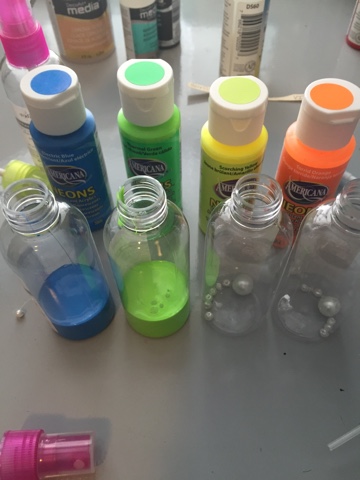
Now to be honest, bright colors are a challenge for me so I headed into this design with determination and channeled Branka! Hehe! I made an extra large tag out of some heavy duty white paper/matboard. Then I dabbed some Alcohol in Pool and Wild Plum onto my craft mat and also splooped down some Colour Arte Silks in Vintage Mint and swiped AI paper through it. Pretty and vibrant!
While I was still deciding on the chippies to use I stamped out 4 butterfly stamps and "painted" those with the 3 colors I used on my background. I colored inside and outside the lines-dern art teacher said I could never paint, haha, look at me now!
Fussy cutting is not for the weak handed, nope! And some good scissors are a must! It seemed to take dayssss to cut out my butterflies but I got er done! I wanted to make 2 butterflies that were layered 3 deep and seemed to be 3D! It took some doing but I finally figured out how I wanted both to look and I think it turned out pretty dern good. Hard to get a picture of though. 
The picture above is the butterfly in the lower left corner of the tag and the picture below is the butterfly in the upper portion of the tag. In real life this is full of depth and dimension!
I used a rather large stamp and some bright blue embossing powder to add the design in the lower left corner. 
My chipboard corners were painted with Colour Arte Radiant Gel-Guatemalan Green and glued to the tag with TomBow Multi. I did add some Spanish moss under the chippie. And the butterfly antenna were made out of black wire. 

The sentiment "Off the Beaten Path" was stamped onto vellum and heat embossed with green embossing powder. I chose those words because bright colors are not my norm and took me down a new path. :) And there you have it-A Bright and Vibrant Tag! Can't wait to see what you create! Remember to stop by my teamies blogs and leave em some love! Hugz and Carpe Diem! ~Niki


I would like to share this large tag with these challenges

Try It On Tuesday-Feminine and Fancy

Our Creative Corner-Return of the Challenge
I chose September 2013-Forgotten Things-My bright blue embossing powder has never been used, the corner chippies have been hoarded for some time now, and the black wire for the antenna is about 1.5 years old and this is the first time I have ever made antenna for any butterfly.

Wednesday, March 2, 2016

Shroom Mixed Media

Ahhh yes! The creative hat has been worn and probably worn out for a bit. My muse is workin but I think I am confusing her. There are so many wonderful techniques and ideas to try and that's what I am doin. In all honesty, I am following some advice and trying to figure out my style. Some people are Shabby Chic, others are Vintage, and still others are 3D Queens, or Abstract. I'm on the journey to discover what I am. Make sense? Lol. Here is a LO I tried. Granted, this is only the 3rd LO I have ever done so we know there's room for improvement. :) Enjoy!
The picture was the inspiration for the colors and the feel of the design. I used a 12x12 cardstock paper that had a not so pretty design on the other side. I really wanted just plain white and luckily it was only patterned on one side. 
I laid out my idea, took a picture to remember where things might go, and then went to town with sprays, H2O's, mica powders, stamps and texture paste through a stencil. 

This paper warped so BAD! I was kinda freakin out a bit but then got the bright idea to iron it back flat. It kinda worked so I kept going. The picture below is after ironing.
I ended up ironing the paper twice. Yes there are small creases but that's okay because I have a secret that will fix it! 

Now, while the paper was drying after the ironing I got to work on painting the chippies. I used black acrylic paint for the base and then poofed on some Primary Element Powder-Green Apple (the same green is on the paper as well), spritzed it with water and done! The mushrooms were painted with Inka Gold-Turquoise and also just the Green Apple. I forgot to take pictures of that step. 

I added all of my elements and decided to ditch some and add others (hence the fairy and corner piece are gone). I popped the picture up on some foam dots, the paper layer behind the picture was created with DI Twisted Citron and Mermaid Lagoon and then splattered with water. The small blue design tucked into the rips of the page is made from polymer clay that I stamped into and sprayed with LSG sprays.
To finish off the design I splattered some DecoArt Misters in Cyan Blue and Turquoise and Titanium White. I then added a bit more stamping and ghost stamping (another first for me) and some cheesecloth. 

Now for my SECRET-to get my paper to lay flat again I laid it face down (before adding the chippies, picture, and flowers) and spritzed the backside with water. I gently swiped my hand around the entire page and then set HEAVY books over it. I waited 2 hours for the page to dry and lifted the books off, it worked! My page was flat again! Wowzers! Now I know. Hehe! 

I am going to pass this layout around to these wonderful challenges:

Creative Embellishments March Challenge

I have used The CE "Believe" chippie and the branch chippie (I cut it in half). I was inspired by the greens and the mushrooms in the pic.