Thursday, July 30, 2015

Art journaling and a bully?

Hello lovely artists! I do hope your week has been going amazingly well. This is my very first time with an art journal (it was on clearance and I thought hmmm-possibly?). I did this art journal because I recieved a rather tumultuous email from an anonymous cyber person. This is my response to the email:

The basic gist of the email was to call me out as lucky, but not an artist, mixed media or otherwise. The person sending the email wanted to know how I was on a specific design team when I don't have the talent to even compare to my teamies. Mean words, and something I pondered for over a week. My dear hubby told me he earased the email and said, "put your feelings into a new art piece". So I did. All I really want is something beautiful to say-the sentiment in this art journal is my way of saying:hey, I can create anything I want and feel good about my talent. I may not be the best and I am still new to mixed media, but, I sure do enjoy the process! I especially enjoy the wonderful people I have met through my art. So thank you to the person that sent that email to me. You got me down for a minute but you will never knock me out! 

Now for my process:
I started by spraying LSG sprays and then inking up the entire background with my Papillon stamp set. 
I then added some Sea Breeze DecoArt acrylic paint with an old credit card and stamped a flower image (Rubber Dance Art Stamp-thanks Bibi!) with the same acrylic paint. 
 I then added some washi tape in random sections and fussy cut my butterflies. I edged all the butterflies with a Copic marker and placed them as if they were growing. 
I then added the cluster of flowers. I dabbed some matte mod podge on the flowers then sprinkled some pink distress glitter over that for some sparkle. My buddy Bubbles-aka Pamellia of My Little Craft Things taught me that trick for the flowers. 

Here is a sort of close up of the two pages. (Picture above and pic below)

The chit chat stickers were edged withy black archival ink. 
Thank you for stopping by and reading a bit about what has happened. I don't usually share personal emails on here but this one struck a nerve and I am sure I am not the first person this has happened to. I am just so happy to know that blog land is such a wonderful place to share this. Ya'll are awesome sauce! Carpe Diem! Hugz!         ~Niki

I would love to share this design with the following lovely challenges: 


Sunday, July 5, 2015

Anything But Cute #3

Can you believe we are onto challenge #3? First I want to thank all of the participants in our last challenge because y'all are awesome sauce and so talented! Time sure does fly when you are having fun! This month the wonderfully talented and sweet Samra is our hostess.  For this challenge, Samra would love to see projects with a romantic theme, a beach/sea theme or both, BUT they must be strongly inspired by the colors of the mood board. For this challenge you MUST display our graphics badge in your post along with our blog name and challenge link.

I was inspired by Summer Love and the beach which go along with the colors of this board. Here is what I came up with:
I started with a piece of scrap paper that I adhered to some left over cardboard. I got out my Distress Inks in Mermaid Lagoon and Shaded Lilac but first I used the paint resist technique from CC3 with my bubble stencil. I then layered the inks and added some "seaweed" (the blue seaweed is actually a flourish stencil since I didn't have an actual seaweed stencil or image)
I knew I wanted to create some sand because every beach has to have sand. I have these little containers of embossing powder that are all mixed together and I used some of my brownish looking EP to create the sand. I added Glossy Accents to the EP and laid it onto my page with a popsicle stick, viola, sand!
I had some netting leftover from a previous disaster of a project and used a piece to create more texture. The clam shells are paper and the shells are made from polymer clay that I rolled and spritzed with LSG sprays. I used alcohol ink on the anchor. 
To me, love really is deeper than the ocean and that is because I caught me a good one. My DH is amazing and I am one lucky gal. :)
We hope you are all inspired and join in with this romantic board challenge. Hop on over to my teamies blogs to see their wonderful creations and leave 'em some bloggy love. Hugs and Carpe Diem! ~Niki

I would love to share this design with these amazing challenges:

Mixed Media Monthly Challenge #14-Summer Days It has been 111-109 degrees F where I live and a beach is the perfect place to cool off.


Crafter's Cafe Challenge-Summer Fun

Eclectic Ellapu-Time Is Flying Past-Pinkies: Travel I would love to travel to another tropical beach with water the color in my design

Crafting by Designs-Anything Goes

Wednesday, July 1, 2015

Steampunk Tic-Tac-Toe

How does Steampunk and Tic-Tac-Toe fit together you may wonder? Well we've done it over at SanDee&Amelie's Steampunk challenge. Pick a row (vertical, horizontal, or diagonal) from the board below and create anything you would like as long as it is Steampunk(ish).


We have not 1 but prizes to give away for this challenge. The lovely Retro Kraft Shop, La Blanche and Irish Teddy's are our sponsors. Awesome sauce right? You have to join in to win! 

I used the middle vertical row: Top hat - Metal - Rust. 


If you want the template for the hat and a total step by step on how to create the structure click HERE

This is what I started with: beautiful right? 


I cut all my crafters foam and glued it together, then gave it a coat of gesso.


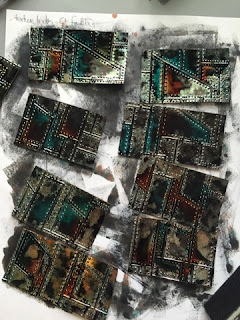
 I then started dry embossing metal foil tape. I used alcohol ink in Pool and Rust along with some generic black ink. Note to self: only use real alcohol ink as the generic black ink kept coming off on my fingers (I fixed this by painting all the foil tape with DecoArt Matte Varnish). I then traced all the panels on the metal foil tape and cute it out while leaving the backing on the foil tape

A lot of the metal foil tape ended up in the trash due to operator (me) error. Oops. Anyway, once the varnish was dry I applied each panel to the top and sides of my hat. 

It was a process but I get 'er done! I outlined all the panels with a black marker to hide the white. Now I am not sure why I painted it white in the first place. Hehehe!

The middle panel was done with a clock embossing folder and I added TH clear crackle to it just for fun. You can see that panel better in the very first picture.

The left side of the hat was embellished with a Create light bulb, film strip, feathers, and half of a gear that was inked with the AI and stamped with a script stamp.

The gears for the top of the hat are Cheery Lynn dies that I painted with a silver metallic paint and added LSG sprays to. 

Hats are really hard to photograph so please excuse the random seeming angles. If anyone has a neat trick to photographing odd shaped art, please let me know. :)
I do so hope you enjoyed this post. And for further enjoyment I have added some lovely pictures of my hat being modeled by some gorgeous and handsome models. These models work for Milk Bones so I was able to reserve them for future posts and modeling gigs as well. 

My Husky, Nanook, modeling my hat. I think he is giving me the "eye"

The new puppy, Keen, wondering how this hat got on his head. :)
Hopefully you have many ideas swirling around in your creative minds and join in with all the fun!  Thanks for stopping by and I look forward to your sweet comments, it sure does brighten my day! Hugs and Carpe Diem! ~Niki

I would really love to share this mini top hat with: