Showing posts with label embossing folder. Show all posts

Saturday, January 16, 2016

Rich Grunge Tag

Well it has been freezing in my neck of the woods and I have been in the art studio creating away. I'm trying new techniques and types of designs because I don't want to be boxed into a certain genre (more to come about that later this month). With that said, I finished my tag for this months Tim Holtz tags of 2016. I didn't finish last years, oops. Who knows what the new year will bring? :)
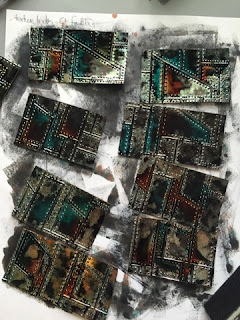
I just had to try this design because of the dark colors and papers used. So happy that I finally got some Black Soot DP! Whoot whoot! I used a new EF from Sizzix (
For the chalkboard technique I went and did my own thing. I used my stamp and some white ColorBox ink. I always smudge it so it reminded me of a chalkboard. I stamped 2 images and fussy cut the butterflies and watch. All three are popped up on foam dots. I finished by adding the sentiment.
This is a tag I really enjoyed making, dark and elegent at the same time. Hugz and Carpe Diem! ~Niki

I would like to share this dark and saucy tag with these challenges: 

 (I used my new brads, new Black Soot DP and a new embossing folder)


(Must use rubber stamping)


BLOGGER CHANGES-Due to the recent changes made by Google, it seems that my Follow By Email button is not working and those that follow me through email are not getting an email. I am not sure how to rectify this situation but I will keep looking for an answer. Maybe try to follow me by email again? 

Wednesday, August 5, 2015

Making Magic at Anything But Cute #4

The fourth challenge is here at Anything But Cute! Can you believe we started this only four months ago? Wowzers! This month the skilled artisan, Georgie, from Little Blue Craft Box is our hostess! She has chosen the theme MAKING MAGIC and this is what she had to say, "Most of us are drawn to the magic of fairy tales and fantasy. The colours are often hypnotic and your mind is free to explore outside the limits of reality. For this challenge, I would like you to create a magical mixed media project strongly inspired by the moodboard. Be inspired by the theme, the colours, the textures or all three. Lets bring a little magic back!"

To me, Knowledge is magic. It opens the doors to so many wonderful adventures and the most magical adventures I have had the pleasure of taking, are usually through a book. That is how I came up with my design for this month. 
This is my first altered book. My background is made from polymer clay that I stamped into, first time with this technique as well. I inked up the clay with Silks, LSG sprays, Inka Gold, DecoArt Metallic paint, and so much more.
The large TH butterfly die was purchased at Alleystamp.com. The lady that runs this store (Janine) is so very sweet and has such amazing prices on her items, plus she loves animals! Wowzers. I just love how versatile this die and embossing folder are (you will see plenty more of this butterfly die!) I sprayed the butterfly and used Inkagold then used UTEE over the entire piece. I added the pen nib for the body after rubbing Inkagold over it.
The dew drops that you can sort of see are made by using glossy accents and randomly dripping a drop here and there. The chippie word was embossed and then embossed again. The chippie clock was painted with gold modeling paste, then I added some sand texture paste and used LSG sprays to age it and patina it. I left the roman numerals raw.
I wanted to do something different to represent the inside of the book so I used Twisted Citron DI and applied it over some tissue paper that was already stamped (this tissue paper was what my stamp was wrapped in from my win over at 12 Tags of 2015) I then used the end of a paintbrush to make rolls from the tissue paper. I applied some glue and glued the rolled up piece to the top and side of the book=pages!!
I do hope you enjoyed this post and join in the magical fun! My teamies have designed some wonderful mixed media pieces so don't forget to stop by their neck of the woods. Thank you for stopping by! Hugz and Carpe Diem! ~Niki

I would be thrilled to share this design with the following challenges:

That Craft Place-Mixed Media Anything Goes

The Artistic Stamper-August-Anything Goes

ABC Challenge-"O" is for Open-Anything Goes

Simply Create Too #91-Anything Goes

Sisters of Craft-August Anything Goes


Wednesday, July 1, 2015

Steampunk Tic-Tac-Toe

How does Steampunk and Tic-Tac-Toe fit together you may wonder? Well we've done it over at SanDee&Amelie's Steampunk challenge. Pick a row (vertical, horizontal, or diagonal) from the board below and create anything you would like as long as it is Steampunk(ish).


We have not 1 but prizes to give away for this challenge. The lovely Retro Kraft Shop, La Blanche and Irish Teddy's are our sponsors. Awesome sauce right? You have to join in to win! 

I used the middle vertical row: Top hat - Metal - Rust. 


If you want the template for the hat and a total step by step on how to create the structure click HERE

This is what I started with: beautiful right? 


I cut all my crafters foam and glued it together, then gave it a coat of gesso.


 I then started dry embossing metal foil tape. I used alcohol ink in Pool and Rust along with some generic black ink. Note to self: only use real alcohol ink as the generic black ink kept coming off on my fingers (I fixed this by painting all the foil tape with DecoArt Matte Varnish). I then traced all the panels on the metal foil tape and cute it out while leaving the backing on the foil tape

A lot of the metal foil tape ended up in the trash due to operator (me) error. Oops. Anyway, once the varnish was dry I applied each panel to the top and sides of my hat. 

It was a process but I get 'er done! I outlined all the panels with a black marker to hide the white. Now I am not sure why I painted it white in the first place. Hehehe!

The middle panel was done with a clock embossing folder and I added TH clear crackle to it just for fun. You can see that panel better in the very first picture.

The left side of the hat was embellished with a Create light bulb, film strip, feathers, and half of a gear that was inked with the AI and stamped with a script stamp.

The gears for the top of the hat are Cheery Lynn dies that I painted with a silver metallic paint and added LSG sprays to. 

Hats are really hard to photograph so please excuse the random seeming angles. If anyone has a neat trick to photographing odd shaped art, please let me know. :)
I do so hope you enjoyed this post. And for further enjoyment I have added some lovely pictures of my hat being modeled by some gorgeous and handsome models. These models work for Milk Bones so I was able to reserve them for future posts and modeling gigs as well. 

My Husky, Nanook, modeling my hat. I think he is giving me the "eye"

The new puppy, Keen, wondering how this hat got on his head. :)
Hopefully you have many ideas swirling around in your creative minds and join in with all the fun!  Thanks for stopping by and I look forward to your sweet comments, it sure does brighten my day! Hugs and Carpe Diem! ~Niki

I would really love to share this mini top hat with: